 Stricklinge Stricken, Häkeln, Filzen, Strickgraffiti

What you need for the Stricklinge cap:
Yarn – super bulky 110 – 130 yd (100 – 120 m)
Gauge – 11 stitches, 16 rows = 4“/10 cm
I use this yarn: Polar by Wolle Rödel.
Needle – DPN 10 (6 mm) and 11 (8 mm); if you prefer, you can use after increase a short circular needle 11 (8 mm) length (25 inch/60 cm)
Pattern for StricklInge cap:
Cast on 52 stitches on DPN 10, evenly spaced (every needle 13 stitches); join in to a ring;
Work in rounds for border rib k2, p2, 2 inch (5 cm);
Now change to needle 11;
Next row increase 12 stitches (every needle 3 stitches, evenly spaced);
Beginn working pattern:
Patt 1 – next 8 stitches = moss stitches (k1, p1, change every other row in p1, k1), place marker;
Patt 2 – next 7 stitches = rib k1, p1, place marker;
Patt 3 – next 9 stitches = k3, p3, k3 for 4 rows, change into p3, k3, p3 for 4 rows, change every 4th row, place marker;
Patt 4 – next 8 stitches = cable, p2, k4, p2, every 8th row right cross (p2, slip 2 stitches to cable needle, leave remaining in the back, knit next 2 stitches, than k2 stitches from cable needle, p2, place marker;)
Repeat pattern repetition;
8-10 inches (20-22 cm) of the border, start the decrease;
1. row:
Knit first and last 2 stitches of moss stitches (patt 1) together, same process for patt 3.
2. row:
Knit first, middle and last 2 stitches of rib (patt 2) together, patt 4 cable, purl stitches together.
Repeat same decrease in row 3 + 4.
For all next rows knit 2 stitches together around. Last 10 stitches break off yarn and thread it through.
Darn in loose ends.
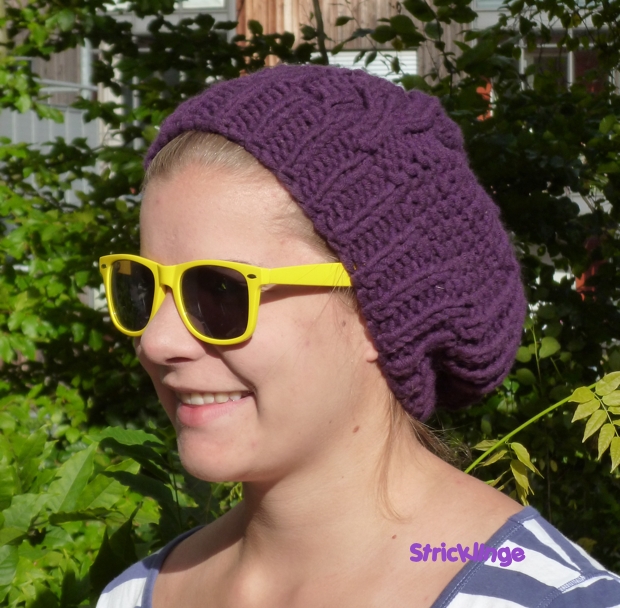
The result:
Important note: This is my first attempt to write an english pattern because many people are visiting my blog from english speaking countries and don’t understand my german patterns. So please forgive me if some terms and translations are not correct. I hope you understand it anyway and are able to knit your own StricklInge cap. If you have any suggestions for improvement in terms of this translation please feel free to leave a comment :)
Thank you for sharing your talent! This is one beautiful hat!